Redrawing
Redrawing (RD), also known as cleaning (CL), is the process of removing Japanese text from a manga. It occurs after denoising (for digital raws) and page alignment (for physical raws) and before typesetting. Dialogue and narration text should always be removed; sound effects should ideally be removed, but if they aren’t they can always be subtitled later (or left untranslated). One should be consistent about whether sound effects are removed.
Edits should all be made in a separate layer from the original.
Common scenarios
| Example | Suggested approaches |
|---|---|
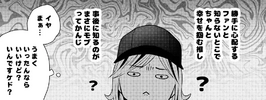
| Basic bubble |
|
| Straight-line art with a screentone above | Use a vector layer to redraw the lines, using standard techniques for the screentone. |
| Screentone gradient | See Screentones. |

|
First, clean all the text with white. Deal with the screentones using standard techniques; draw the parts of the wall and ceiling using vector layers. The head and hair can be redrawn using the vector layer, but a brush might be easier. |
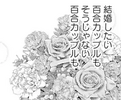
| Asset | Typically, when you see a complex shape like this it is likely an asset taken from the CSP asset store. Even if you don’t buy it, you can often just copy and paste the asset’s preview and get a good enough result. You may have to apply the manga-specific screentone. |
| Standard background | In this case, manually redrawing the background would be a lot of work. However, this is a standard background asset, and can be found in our collection of standard screentones. The best option is to replace the background entirely and then apply the manga-specific screentone to it. |
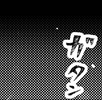
| Dithered lines in a translucent bubble | Draw the lines in using a vector layer or a brush, then apply the screentone to it. |
Brushes
add note about drawing tablets
add note about CSP’s nice brushes
- no variance in size and opacity
- varies in size
- varies in opacity
- varies in both
- roller brush (for clouds)
- chalk and charcoal brushes which are useful for noisy lines
- stipple brush
Vector layers
advantages and disadvantages
Controlling hardness
- in the brush itself
- with a blurring layer
High-contrast filters
Screentones
Clone stamp
Copy and paste
todo (valence): worked example: shall we continue, pg. 563
Screentone tiling
todo (valence): worked example: shall we continue, pg. 561
Screentone recreation
todo (valence): worked example: only show yourself to me
Applying a screentone
Once you have made your screentone, it is often needed to “apply” it – that is, convert a layer that uses various shades of grey into a layer that uses various shades of your screentone.
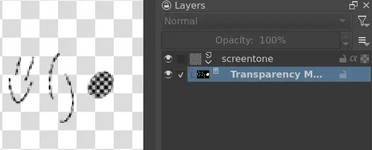
A simple way to do this is to add your layer as a transparency mask on the screentone. Then, black becomes transparent and white makes the screentone show up (if you want it the other way around, you can just invert the mask). A demo of this in Krita is shown below:
However, since transparency masks are rather simplistic (they’re raster layers, can’t themselves take filter masks, etc), there is a more general method: make a layer group containing the layer you wish to apply the screentone to below, and the screentone itself above, with “inherit alpha” selected on the top layer (the ɑ button).
Now, instead of black being transparent and white being the screentone, transparent pixels are transparent and opaque pixels become the screentone. If you have a layer that already uses shades of grey, you can add a “Colour to Alpha” filter mask (it’s in the “Colours” section of the filter masks) to convert white into transparency.


