Redrawing
Redrawing (RD), also known as cleaning (CL), is the process of removing Japanese text from a manga. It occurs after denoising (for digital raws) and page alignment (for physical raws) and before typesetting. Dialogue and narration text should always be removed; sound effects should ideally be removed, but if they aren’t they can always be subtitled later (or left untranslated). One should be consistent about whether sound effects are removed.
Edits should all be made in a separate layer from the original.
Lots of these instructions will depend on your choice of editor; different editors wil have different features. It’s worth getting to know your editor.
Common scenarios[edit]
| Example | Suggested approaches |
|---|---|
| Basic bubble |
|
| Straight-line art with a screentone above | Use a vector layer to redraw the lines, using standard techniques for the screentone. |
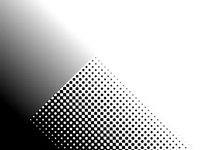
| Screentone gradient | See Screentones. |

|
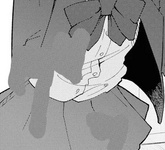
First, clean all the text with white. Deal with the screentones using standard techniques; draw the parts of the wall and ceiling using vector layers. The head and hair can be redrawn using the vector layer, but a brush might be easier. |
| Asset | Typically, when you see a complex shape like this it is likely an asset taken from the CSP asset store. Even if you don’t buy it, you can often just copy and paste the asset’s preview and get a good enough result. You may have to apply the manga-specific screentone. |
| Standard background | In this case, manually redrawing the background would be a lot of work. However, this is a standard background asset, and can be found in our collection of standard screentones. The best option is to replace the background entirely and then apply the manga-specific screentone to it. In this instance, you’ll also need to apply a threshold filter (and then colour adjustment filter) to the background to make sure that it’s only two colours. |
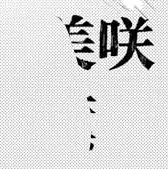
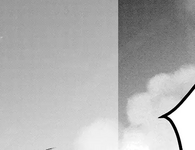
| Dithered lines in a translucent bubble |
|
| Speedlines | See Speedlines. |
| Compression artefacts on a screentone | See Compression artefacts |
Brushes[edit]
Brushes are mostly useful if you have a drawing tablet; trying to draw lines with a mouse is painful, and you’d be better off using a vector layer instead. Drawing tablets are really quite useful for both redrawing and typesetting (if you want to handwrite your SFX) — Wacom CTL-472 is a common cheap choice (although allegedly, the nib quality of recent models is worse, so it may not last long).
Clip Studio has many nice brushes built-in. Krita has a decent selection too; Photoshop doesn’t have many, but you can always download more, for example Sara’s brush pack.

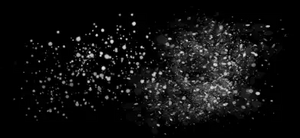
Some important brushes include:
- a basic brush with no variance in size and opacity;
- a brush that varies in size, useful for line art;
- a brush that varies in opacity, useful as a softer brush for some sections;
- a brush that varies in both size and opacity;
- a roller brush (I find this very useful for clouds);
- chalk and charcoal brushes which are useful for noisy lines;
- a stipple brush, which creates noise.
Stipple brushes in particular are very useful, as adding noise can easily hide imperfect redraws and emulate certain screentones (especially when your raws have been compressed anyway).
Vector layers[edit]
Lots of redrawing can be done in vector layers as well as raster ones. In comparison to using brushes, vector layers:
- more easily allow editing, since one can simply move around the endpoints of the lines/shapes and adjust their thickness;
- become more difficult to work with if you have a large number of lines in a small space, as the creation of each line is individually more time-consuming;
- can very easily produce aesthetic-looking curves, which is helpful if you don’t have a steady hand.
Straight lines, buildings, cars, geometric shapes, and some bubbles are often best drawn inside vector layers; more complex and organic things work better in raster ones. You should learn how to use both.
Controlling hardness[edit]
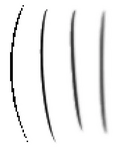
Hardness, roughly, controls how blurry something looks. You should aim to replicate the brush hardness used in the original manga.
Some programs, like Photoshop, allow you to control the hardness of each individual brush stroke. Another way, which works for both vector and raster layers, is to apply a “Gaussian blur” filter mask to blur your layers.
High-contrast filters[edit]
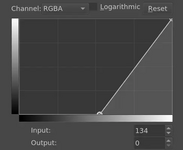
To more easily spot mistakes in redraws, it is very useful to apply high-contrast filters to the entire image. For example, the below colour adjustment filter (in Krita) increases the contrast of the light end of the image, emphasizing small differences in whites. If the steep line was moved to the left, it would instead emphasize small differences in blacks.
Just because something looks fine on your monitor and to your eyes doesn’t mean it will look that way to everyone – some people have setups that make certain differences that might be invisible to you, glaringly obvious. Thus, you should always check that you’re getting the tones right by increasing the contrast.
Screentones[edit]
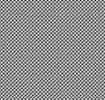
There are four ways to deal with screentones: clone stamp, copy-paste (which works very similar to clone stamping), tiling and recreation.
When starting a new project, one should first attempt to tile or recreate the screentone – in general, each manga uses one main screentone. For each individual page, it may be easier to either use your tile or copy-paste.
Screentone tiling[edit]
- Find a large uninterrupted section of flat screentone (i.e. not a gradient). It should be a middle-ish tone: if it’s too light or too dark, it’ll look bad when you apply colour adjustment masks to it.
- Select the section of screentone and extract it to its own layer. Export the layer to an image, then plug it into our screentone tiling tool to find the optimal tiling resolution.
- Make a tile out of this, and use it for redrawing!
To demonstrate, we will use this panel. We have a large-ish uninterrupted section of flat screentone on the left, which we select and find the tiling resolution of:
After extracting this to its own layer, we export that layer to a file (making sure to preserve transparency/the alpha channel) and plug into the tiling tool:
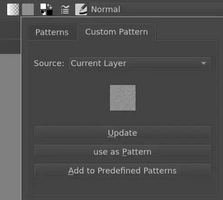
From this, we see that the optimal tiling resolution is 57×57. We crop a 57×57 square from our extracted layer and make a pattern from it. In Krita, one has to open the pattern menu and click “Update” followed by “use as Pattern”; in CSP, set “Image Material Layer” to tile; the process should be similar in other editors.
After this, the fill tool can be used to fill an entire page with the screentone. Align the screentone to the correct place on the page, and you can use a transparency mask to draw over the text. In our case, that gives this result:
At this point, finishing the redraw simply involves applying appropriate colour adjustment masks and drawing in line art.
Screentone recreation[edit]
Various editors have screentone functionality built-in, and this can be used to recreate screentones. For example, Krita has a halftone filter which can convert gradients into screentone gradients:
Getting these to look exactly like the manga’s screentone involves a lot of fiddling and trial-and-error, but can produce very clean results.
Clone stamp[edit]
I (valence) don’t use it so I can’t really say much here. It’s very similar to copy and paste; I generally prefer the latter because it’s more precise, and works in more situations. But I know many people have success with clone stamp.
Copy and paste[edit]
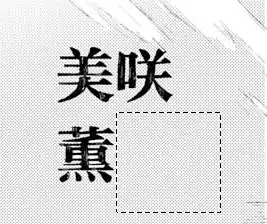
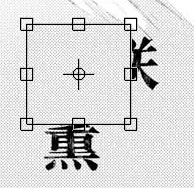
In this example, we have a screentone background with text on top. We use the rectangle selection tool (though more complex cases will use the polygonal selection tool) to select a portion of the screentone.
We extract this selection into its own layer, and transform it to be above the text (making sure that the screentone is aligned). The layer is duplicated and the process repeated until all the text is covered.
If the screentone is a gradient, make sure that the gradient matches – you may need to apply a colour adjustment filter to make it look better. High-contrast filters can help here. In the below video, we create the gradient by first adding a colour adjustment filter to the layer group that has our copy-pasted screentone sections. We then use the gradient tool on this filter mask to make it blend it with the surroundings.
Finally, add a transparency mask and use a basic brush to brush over the parts of the image that actually need replacing.
Applying a screentone[edit]
Once you have made your screentone, it is often needed to “apply” it – that is, convert a layer that uses various shades of grey into a layer that uses various shades of your screentone.
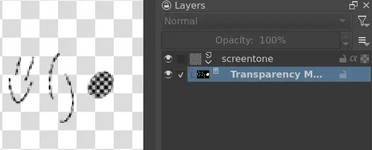
A simple way to do this is to add your layer as a transparency mask on the screentone. Then, black becomes transparent and white makes the screentone show up (if you want it the other way around, you can just invert the mask). A demo of this in Krita is shown below:
However, since transparency masks are rather simplistic (they’re raster layers, can’t themselves take filter masks, etc), there is a more general method: make a layer group containing the layer you wish to apply the screentone to below, and the screentone itself above, with “inherit alpha” selected on the top layer (the ɑ button).
Now, instead of black being transparent and white being the screentone, transparent pixels are transparent and opaque pixels become the screentone. If you have a layer that already uses shades of grey, you can add a “Colour to Alpha” filter mask (it’s in the “Colours” section of the filter masks) to convert white into transparency.
Speedlines[edit]
The simplest way to redraw speedlines is just to use a vector layer. However, in some cases there are more tricks available.
The 1px trick[edit]
This trick involves selecting a 1px-high rectangle to capture a row of the existing speedlines, then using a free or perspective transform to extend them to cover the text. A demonstration in Photoshop is given below (it is imperfect, but with more care, good results can get obtained).
Recreation (CSP)[edit]
Clip Studio Paint has a built-in tool for generating speedlines.
Recreation (online)[edit]
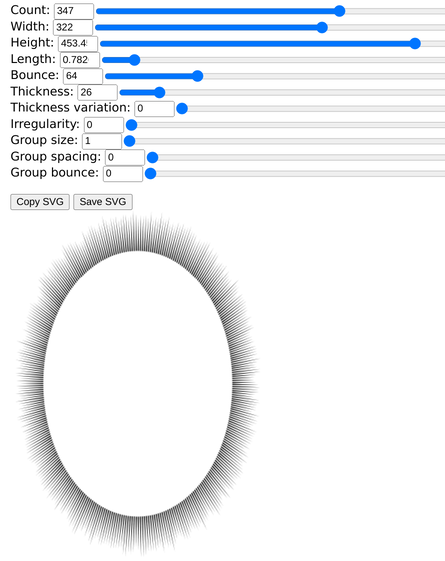
The scanlation tools website has a speedlines generator. It’s a little less powerful than CSP but should cover most cases. You can right-click and copy image to insert it into your editor; if you use Krita, then you can also use the “Copy SVG” or “Save SVG” buttons to copy-paste as a vector layer, which has the advantage of scaling more easily.
By setting the length parameter to a value less than one, one can also use this tool to recreate speech bubbles that are made out of speedlines, for example:
Recreation (not Photoshop)[edit]
Many editors – though notably excluding Photoshop – have an assistant tool that allows setting a vanishing point somewhere in the image, and then snapping all brush strokes to this point.
In Krita, this is achieved by enabling “Snap to Assistants” in the brush tool.
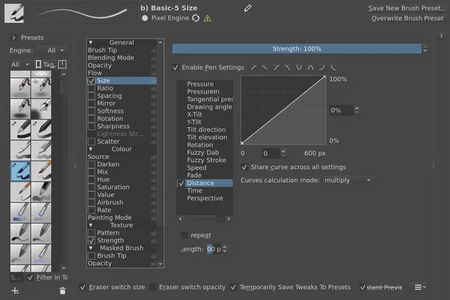
In this demo, the brush is configured to automatically grow in size depending on the length of the stroke, in order to give the speedlines the effect they gave.
Compression artefacts[edit]
If you have clone layers available to you (e.g. in Krita but not CSP), this very useful trick allows you to recreate the kind of compression artefact you get around lines that are above screentones.
A video of it being done in Krita is below, but the steps are:
- Duplicate the layer that contains the screentone, and increase the contrast of the duplicate. (At this point, you can just add a transparency mask to this layer if you wish to do it manually.)
- Make a clone layer of the layer that contains the lines, and clip the high-contrast screentone layer to it.
- Add blur to the clone layer, then ensure that slightly-opaque pixels become even more opaque.


