Redrawing: Difference between revisions
mNo edit summary |
No edit summary |
||
| Line 3: | Line 3: | ||
Edits should all be made in a separate layer from the original. | Edits should all be made in a separate layer from the original. | ||
Lots of these instructions will depend on your [ | Lots of these instructions will depend on your [[Editor_Comparison|choice of editor]]; different editors wil have different features. It’s worth getting to know your editor. | ||
== Common scenarios == | == Common scenarios == | ||
Revision as of 17:58, 6 January 2025
Redrawing (RD), also known as cleaning (CL), is the process of removing Japanese text from a manga. It occurs after denoising (for digital raws) and page alignment (for physical raws) and before typesetting. Dialogue and narration text should always be removed; sound effects should ideally be removed, but if they aren’t they can always be subtitled later (or left untranslated). One should be consistent about whether sound effects are removed.
Edits should all be made in a separate layer from the original.
Lots of these instructions will depend on your choice of editor; different editors wil have different features. It’s worth getting to know your editor.
Common scenarios
| Example | Suggested approaches |
|---|---|
| Basic bubble |
|
| Straight-line art with a screentone above | Use a vector layer to redraw the lines, using standard techniques for the screentone. |
| Screentone gradient | See Screentones. |

|
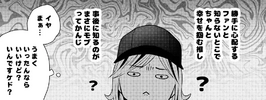
First, clean all the text with white. Deal with the screentones using standard techniques; draw the parts of the wall and ceiling using vector layers. The head and hair can be redrawn using the vector layer, but a brush might be easier. |
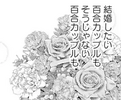
| Asset | Typically, when you see a complex shape like this it is likely an asset taken from the CSP asset store. Even if you don’t buy it, you can often just copy and paste the asset’s preview and get a good enough result. You may have to apply the manga-specific screentone. |
| Standard background | In this case, manually redrawing the background would be a lot of work. However, this is a standard background asset, and can be found in our collection of standard screentones. The best option is to replace the background entirely and then apply the manga-specific screentone to it. In this instance, you’ll also need to apply a threshold filter (and then colour adjustment filter) to the background to make sure that it’s only two colours. |
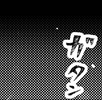
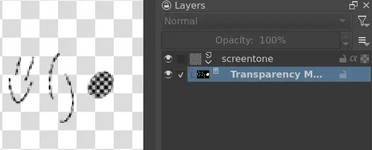
| Dithered lines in a translucent bubble |
|
Brushes
Brushes are mostly useful if you have a drawing tablet; trying to draw lines with a mouse is painful, and you’d be better off using a vector layer instead. Drawing tablets are really quite useful for both redrawing and typesetting (if you want to handwrite your SFX) — Wacom CTL-472 is a common cheap choice (although allegedly, the nib quality of recent models is worse, so it may not last long).
Clip Studio has many nice brushes built-in. Krita has a decent selection too; Photoshop doesn’t have many, but you can always download more, for example Sara’s brush pack.

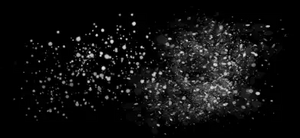
Some important brushes include:
- a basic brush with no variance in size and opacity;
- a brush that varies in size, useful for line art;
- a brush that varies in opacity, useful as a softer brush for some sections;
- a brush that varies in both size and opacity;
- a roller brush (for clouds);
- chalk and charcoal brushes which are useful for noisy lines;
- a stipple brush, which creates noise.
Stipple brushes in particular are very useful, as adding noise can easily hide imperfect redraws and emulate certain screentones (especially when your raws have been compressed anyway).
Vector layers
Lots of redrawing can be done in vector layers as well as raster ones. In comparison to using brushes, vector layers:
- more easily allow editing, since one can simply move around the endpoints of the lines/shapes and adjust their thickness;
- become more difficult to work with if you have a large number of lines in a small space, as the creation of each line is individually more time-consuming;
- can very easily produce aesthetic-looking curves, which is helpful if you don’t have a steady hand.
Straight lines, buildings, cars, geometric shapes, and some bubbles are often best drawn inside vector layers; more complex and organic things work better in raster ones. You should learn how to use both.
Controlling hardness
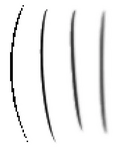
Hardness, roughly, controls how blurry something looks. You should aim to replicate the brush hardness used in the original manga.
Some programs, like Photoshop, allow you to control the hardness of each individual brush stroke. Another way, which works for both vector and raster layers, is to apply a “Gaussian blur” filter mask to blur your layers.
High-contrast filters
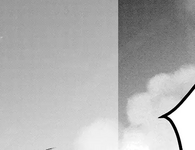
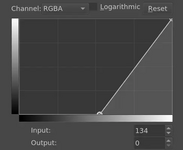
To more easily spot mistakes in redraws, it is very useful to apply high-contrast filters to the entire image. For example, the below colour adjustment filter (in Krita) increases the contrast of the light end of the image, emphasizing small differences in whites. If the steep line was moved to the left, it would instead emphasize small differences in blacks.
Just because something looks fine on your monitor and to your eyes doesn’t mean it will look that way to everyone – some people have setups that make certain differences that might be invisible to you, glaringly obvious. Thus, you should always check that you’re getting the tones right by increasing the contrast.
Screentones
Clone stamp
Copy and paste
todo (valence): worked example: shall we continue, pg. 563
Screentone tiling
todo (valence): worked example: shall we continue, pg. 561
Screentone recreation
todo (valence): worked example: only show yourself to me
Applying a screentone
Once you have made your screentone, it is often needed to “apply” it – that is, convert a layer that uses various shades of grey into a layer that uses various shades of your screentone.
A simple way to do this is to add your layer as a transparency mask on the screentone. Then, black becomes transparent and white makes the screentone show up (if you want it the other way around, you can just invert the mask). A demo of this in Krita is shown below:
However, since transparency masks are rather simplistic (they’re raster layers, can’t themselves take filter masks, etc), there is a more general method: make a layer group containing the layer you wish to apply the screentone to below, and the screentone itself above, with “inherit alpha” selected on the top layer (the ɑ button).
Now, instead of black being transparent and white being the screentone, transparent pixels are transparent and opaque pixels become the screentone. If you have a layer that already uses shades of grey, you can add a “Colour to Alpha” filter mask (it’s in the “Colours” section of the filter masks) to convert white into transparency.


